

Goldshell BOX Ⅱ Tutorial
Dear Customers, Goldshell appreciates your purchase and support. We have prepared a detailed tutorial for you. However, if you have any problems using miners, please get in touch with our Goldshell staff for help.
This tutorial can apply to all BOX II series miners.
1. Unboxing Check
Before start using miner, please have an initial inspection with the miner:
- Check whether the appearance of the miner is deformed or damaged and whether the fan is damaged.
- Check whether there is any abnormal noise in the miner, and observe whether there is a case where the heat sink falls off.
If any of the above abnormalities are found, please take a photo first and contact the after-sales service by submitting the ticket through: https://www.goldshell.com/support-center/
2. Accessories Prepare
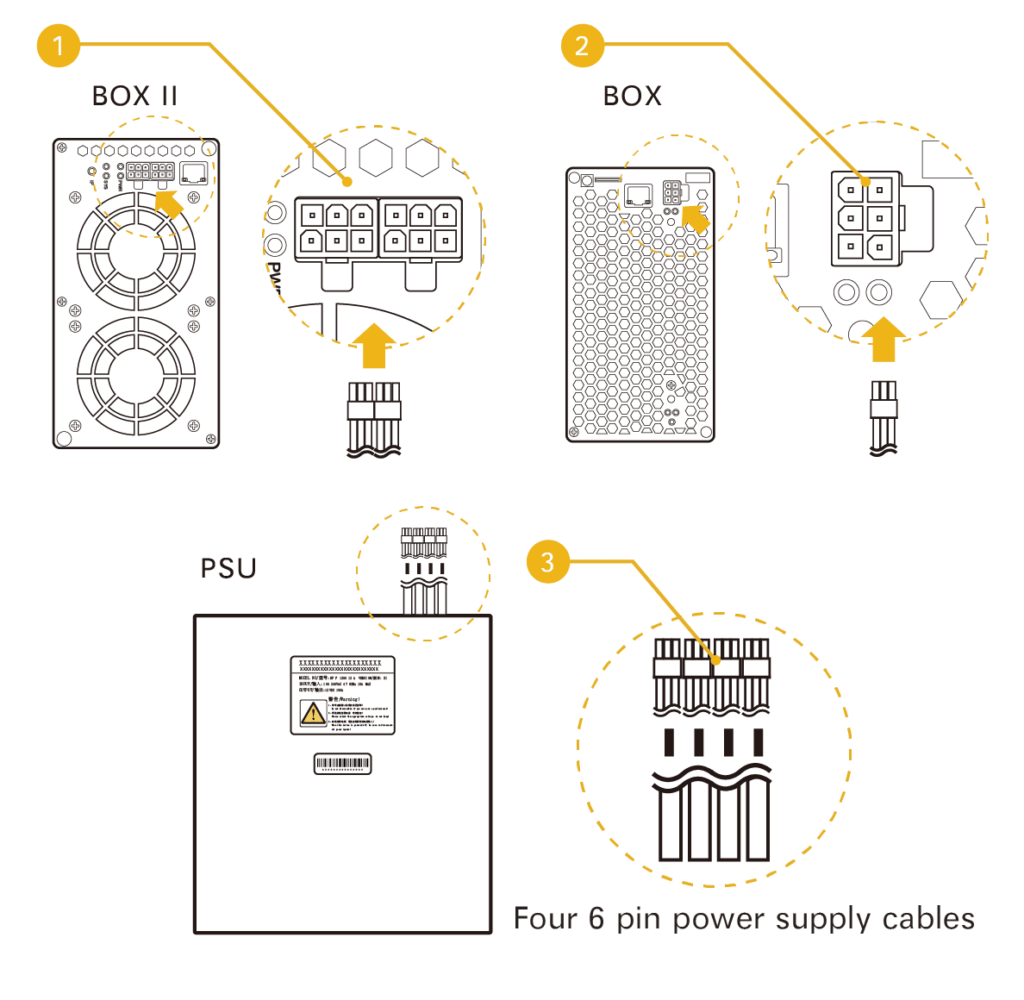
Goldshell BOX II series needs to be equipped with a power supply with a dual interface and an Ethernet cable:
Power Supply requirements: Goldshell customized 1200W PSU can power two BOX II at the same time. However, it would be best if you plugged in the dual interface and ethernet cable when the power is off, then you can power the miners up.
- BOX Il miners MUST connect with TWO 6-pin power ports.*Make sure you plug in 2 separate 6-pin ports before powering on;
- BOX only needs ONE six pins power supply cable.*Make sure you plug in the cables first then power up the miners.
- We highly recommend using Goldshell customized PSU. If youchoose to use an ATX power supply instead, that might shorten theservice life of the miner.
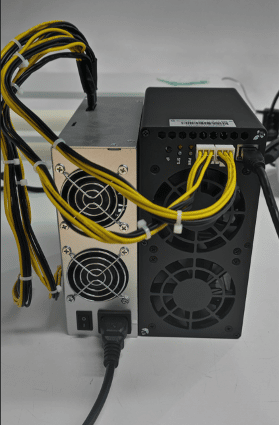
3. Connect the miner
Connect the BOX II miner with a network cable to the LAN through a router or network switch, and then plug in the power cable.
The red light and green light will flash at the same time during the startup process.
After the self-test, the red light goes down, and the green light is always on, which means the miner is successfully started.
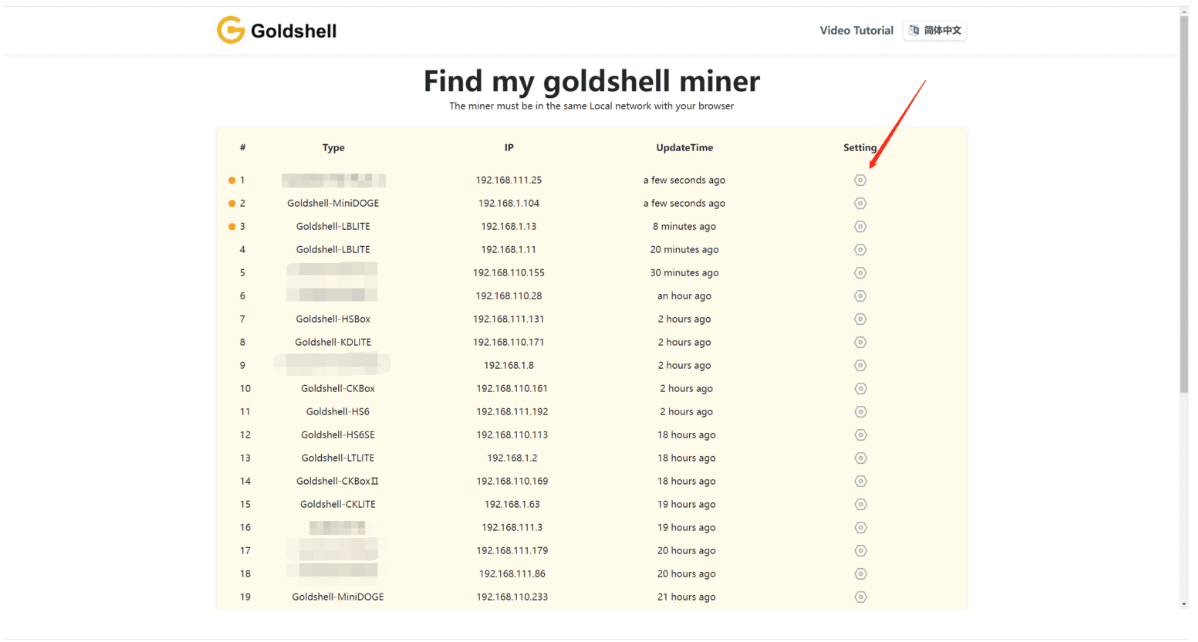
4. Enter Miner Control Dashboard
After innovative design and development by Goldshell engineers, you only need to go to find.goldshell.com, find all available miners under the same LAN, and then click to enter the setting.
5. Miner Control
-
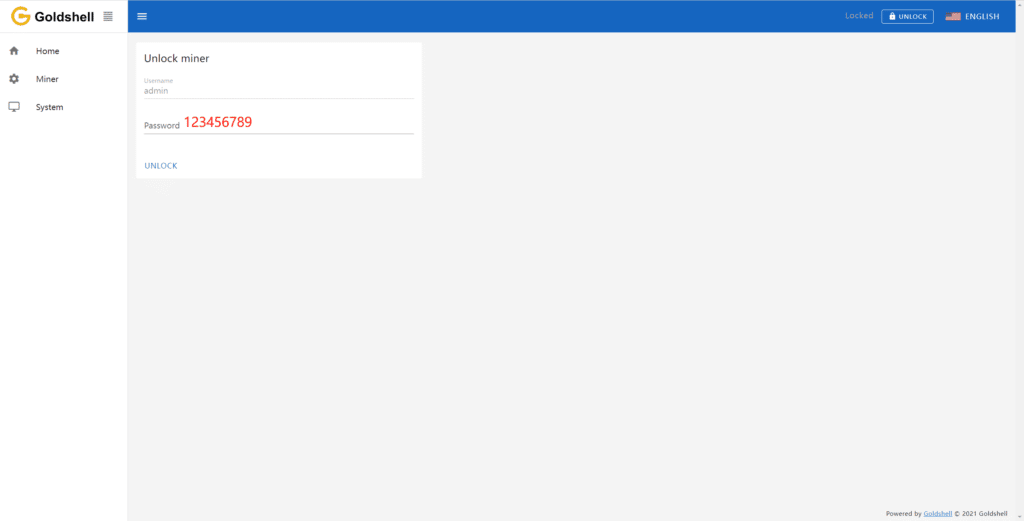
Unlock Miner
You have been guided into the miner control dashboard, and please click “Unlock” on the top-right corner of the page and enter the password to unlock your miner.
The initial password of the miner is 123456789
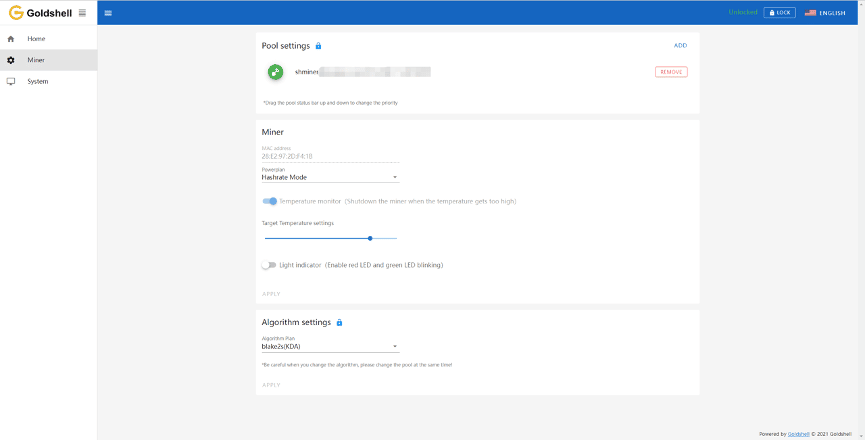
- Add Pool
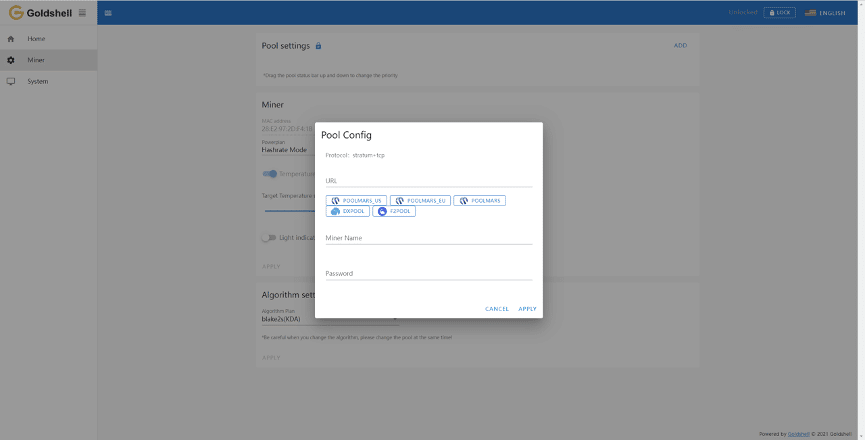
After the miner is unlocked, click “Miner” on the left side of the page, and enter the pool setting page. Finally, click “ADD” to enter Pool Config to set up your mining pool information.
Set the miner name with a password based on your choice to enter the mining pool address and URL. Use “DxPool” as an example, and the parameters are set as follows:
User Name: DxPool sub-account name
Password: Set anything you want, like 1 or x.
After finishing the setting, click the “Apply” button, and wait until the Pool setting shows in green means you successfully connected to the pool.
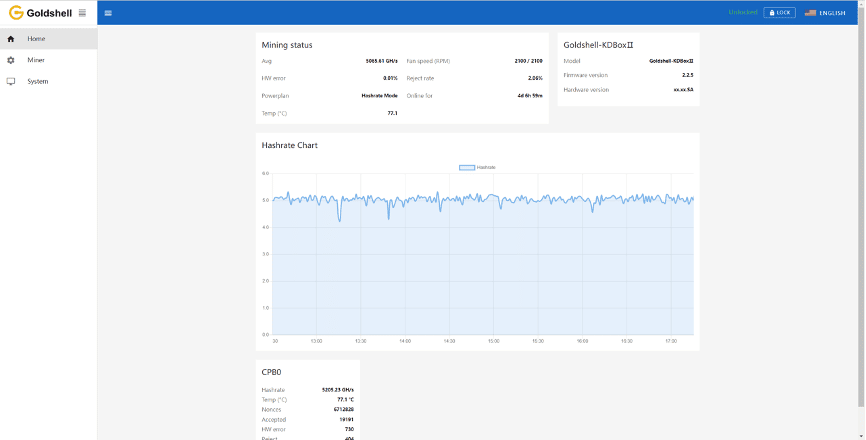
Wait until the pool connects successfully. Then, click “Home” and go back to the miner page. If the hashrate curve is shown, you have connected to the pool successfully.
How to switch between Default Hashrate mode and low-power mode
You have been guided into the miner control dashboard. Click on “Miner” and you can choose your preferred mode either “Hashrate Mode” nor “Low-power Mode”


* Please follow the instructions to use the miner. If you have any problems, don’t hesitate to contact Goldshell’s official staff for help. Any unallowable removal or installation miner will affect your warranty maintenance.