

Goldshell BOX Tutorial
This tutorial is applicable to all BOX miner
1. Check the miner
- Before run the miner, do a preliminary inspection first.
- Check whether the miner is deformed or damaged, and whether the fans are damaged.
- Check whether there is abnormal sound in the miner, and observe whether there is heat sink falling off.
- If above situation happens, please take photo first and submit a support ticket on Goldshell website.
2. Prepare network cable and power supply
- Buy the power supply produced by Goldshell(Goldshell customize Power Supply)It can power up 4 Box miners.
OR
- 80 PLUS GOLD power supply, the required specifications: 500W or more ATX Gold PSU, output current 12V 25A or more.
- Please note, keep the correct orientation when plugging in the power supply to prevent short circuit.
3. Connect power supply and network cable
- Correct status of indicator
- Power indicator: the red and green lights flash when connected, the red light is off for a short time, and the green light is always on.
- Network indicator: the red and green lights flash when connected, the red light is off for a short time, and the green light keeps flashing. (If the indicator status is abnormal, please refer to the FAQ)
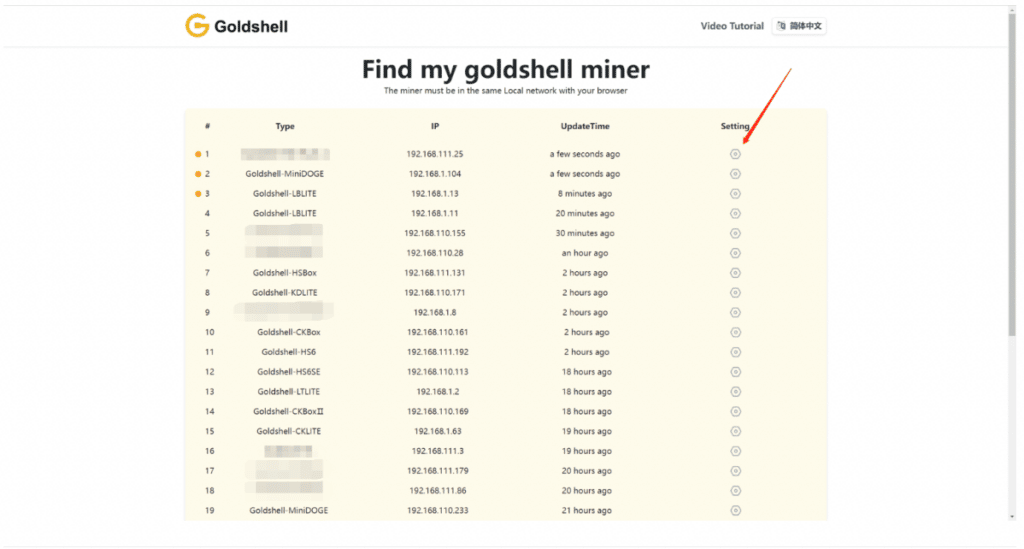
4. Get the IP of the miner and entering the miner’s dashboard
Visit find.goldshell.com in the browser. Google chrome is recommended.
Click the corresponding icon in the setting column to enter the device dashboard.
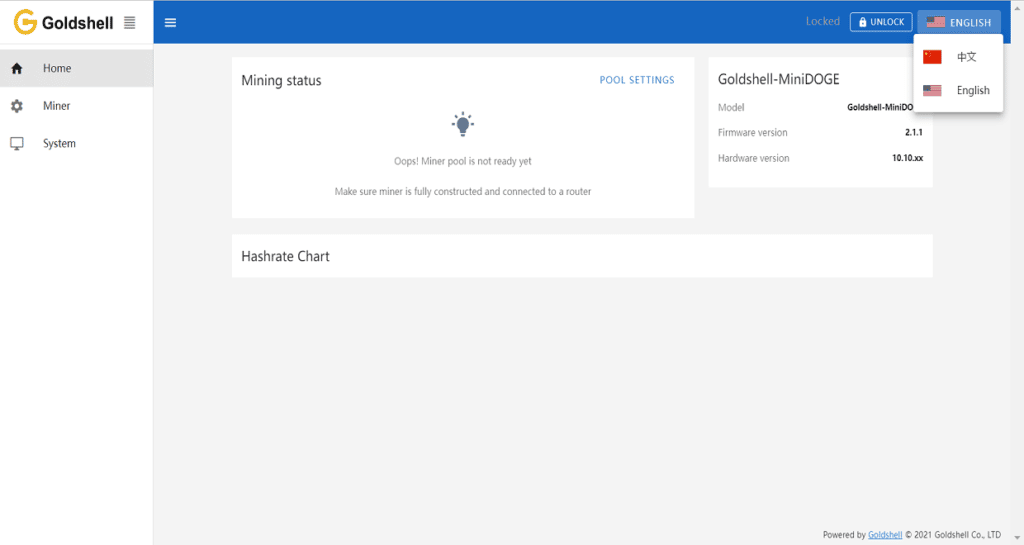
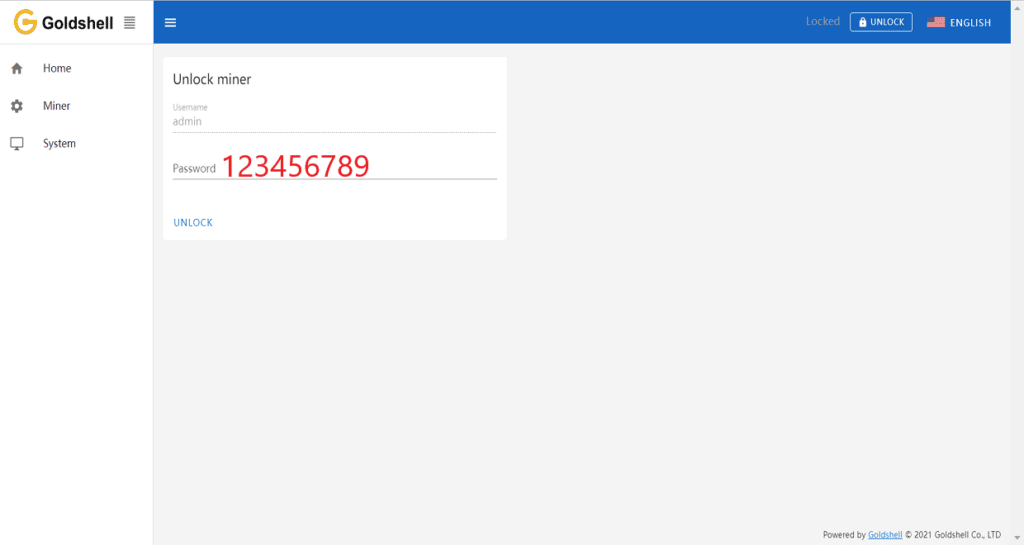
5. Unlock miner
- You can switch languages and unlock miner in the upper right corner of the webpage.
- Click the [unlock] button in the upper right corner of the page and input the password to unlock. The factory password of the miner is [123456789].
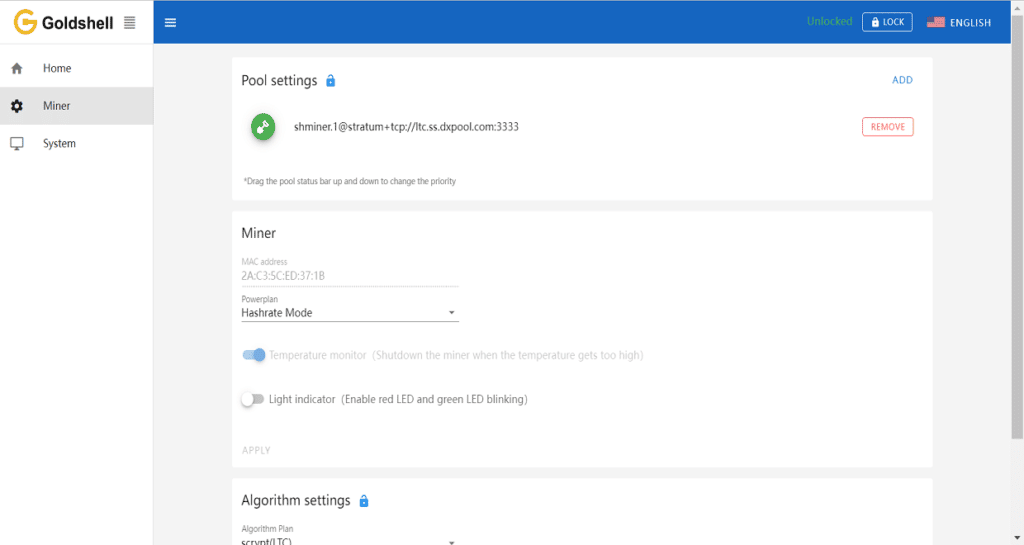
6. Pool setting
- Unlock your miner.
- Visit the [Miner] page and [Pool Seeting], find the [Add] and click
- Enter the pool address and port number according to your choice, and set the miner name and password. The example pool in the figure above is the Dxpool.
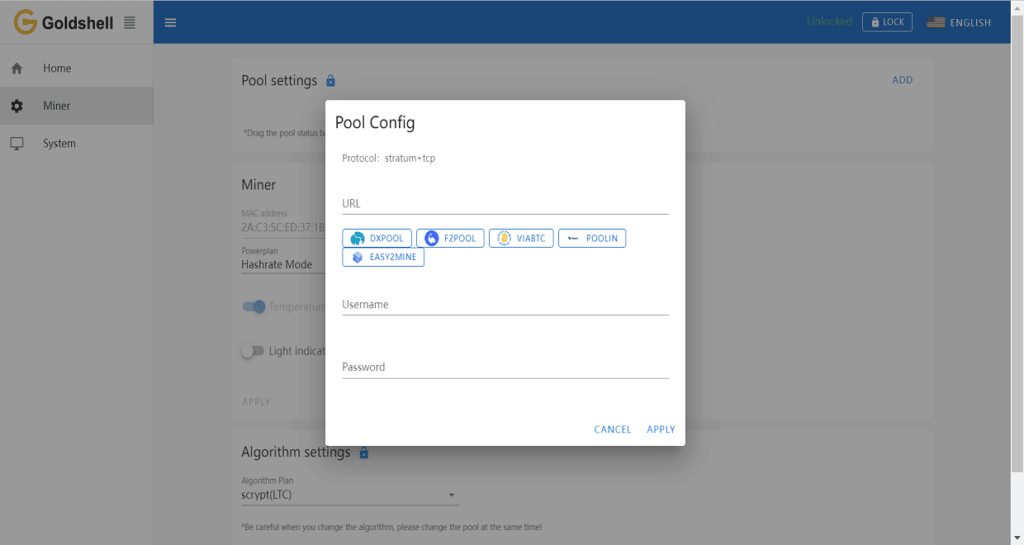
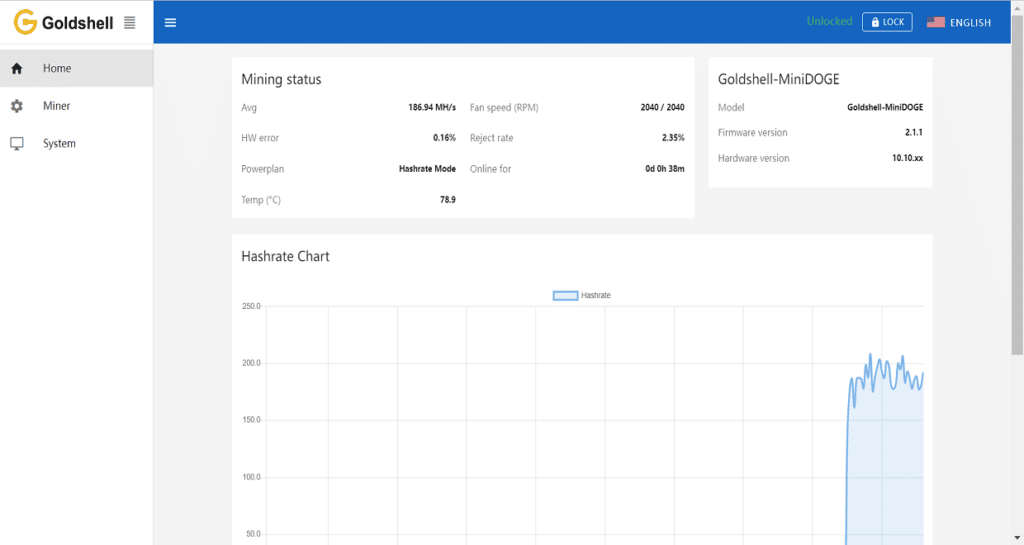
- Wait for the pool connect successfully, Visit the [Home] page and observe the chart. If you find a hashrate curve, the pool configuration is successful.
*Please pay attention to the precautions, otherwise your warranty may be affected.